반응형
캐릭터를 움직이고, 카메라를 회전시키는데에는 두가지 설정이 필요하다
1. 카메라 세팅
2. 축 매핑
3. 축 바인딩
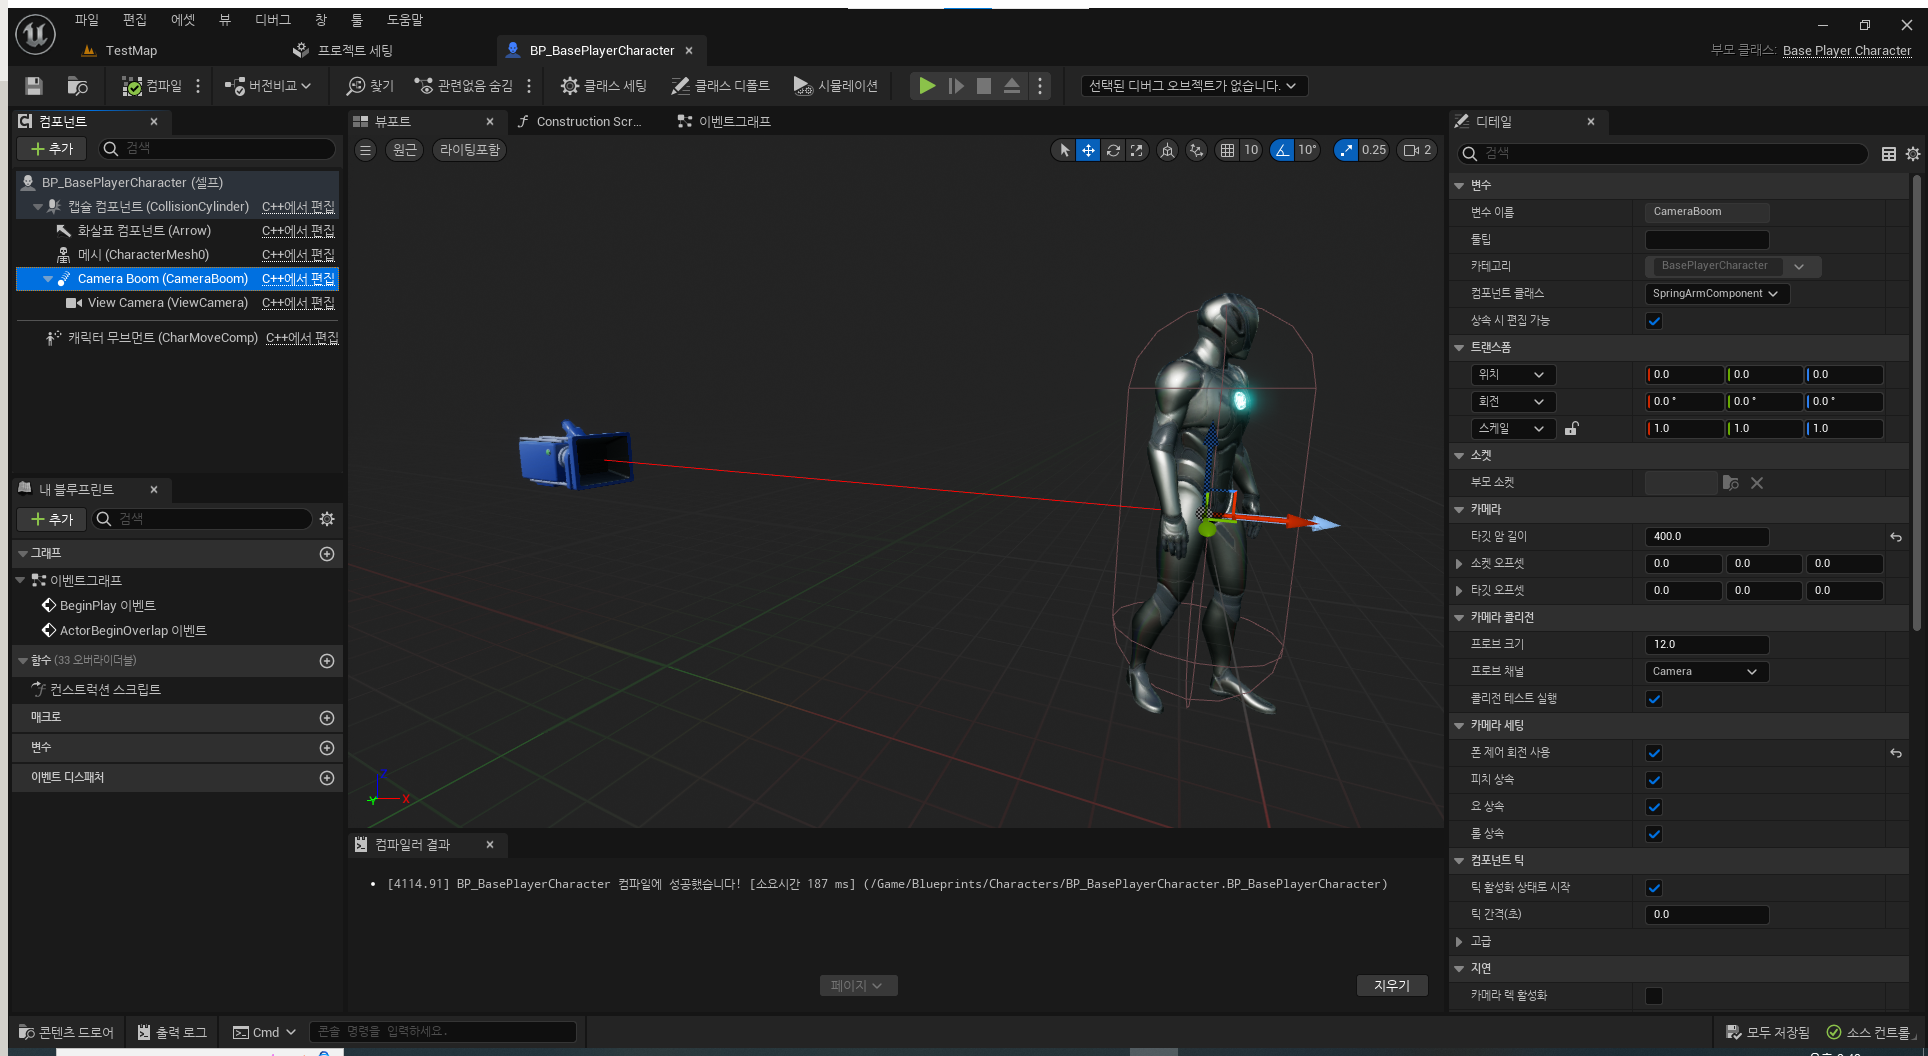
먼저 카메라 세팅부터 하자면, 블루프린트 에디터에서 할 수도 있지만, C++ 클래스로 작업한다.
카메라 세팅할 캐릭터 클래스의 생성자에서 컴포넌트를 추가하고, 설정하는 코드를 작성해 준다.
ABasePlayerCharacter::ABasePlayerCharacter()
{
	// Tick 함수 활성화
	PrimaryActorTick.bCanEverTick = true;

	// 스프링 암 컴포넌트로 카메라 회전을 하기 위해서 아래 옵션들은 모두 false
	bUseControllerRotationYaw = false;
	bUseControllerRotationPitch = false;
	bUseControllerRotationRoll = false;

	// 아래 옵션을 true로 해주면 움직이는 방향으로 캐릭터가 자동으로 회전된다. RotationRate는 얼마나 빠르게 회전하느냐.
	GetCharacterMovement()->bOrientRotationToMovement = true;
	GetCharacterMovement()->RotationRate = FRotator(0.f, 400.f, 0.f);

	// 스프링 암 컴포넌트를 생성 -> 루트 컴포넌트에 Attach -> 암 길이 설정(카메라에서 캐릭터를 얼마나 멀리 위치하는지) -> 카메라 회전을 위한 옵션
	CameraBoom = CreateDefaultSubobject<USpringArmComponent>(FName("CameraBoom"));
	CameraBoom->SetupAttachment(GetRootComponent());
	CameraBoom->TargetArmLength = 300.f;
	CameraBoom->bUsePawnControlRotation = true;
	// 카메라 생성 -> 스프링 암 컴포넌트에 Attach
	ViewCamera = CreateDefaultSubobject <UCameraComponent> (FName("ViewCamera"));
	ViewCamera->SetupAttachment(CameraBoom);
}
컴파일하면 해당 클래스를 상속받은 블루프린트에 아래와 같이 컴포넌트가 생긴다.
다음으로 축 매핑 알아보자면 간단하게 언리얼 에디터에서 프로젝트 세팅 -> 입력 -> 축 매핑을 해주면 된다.
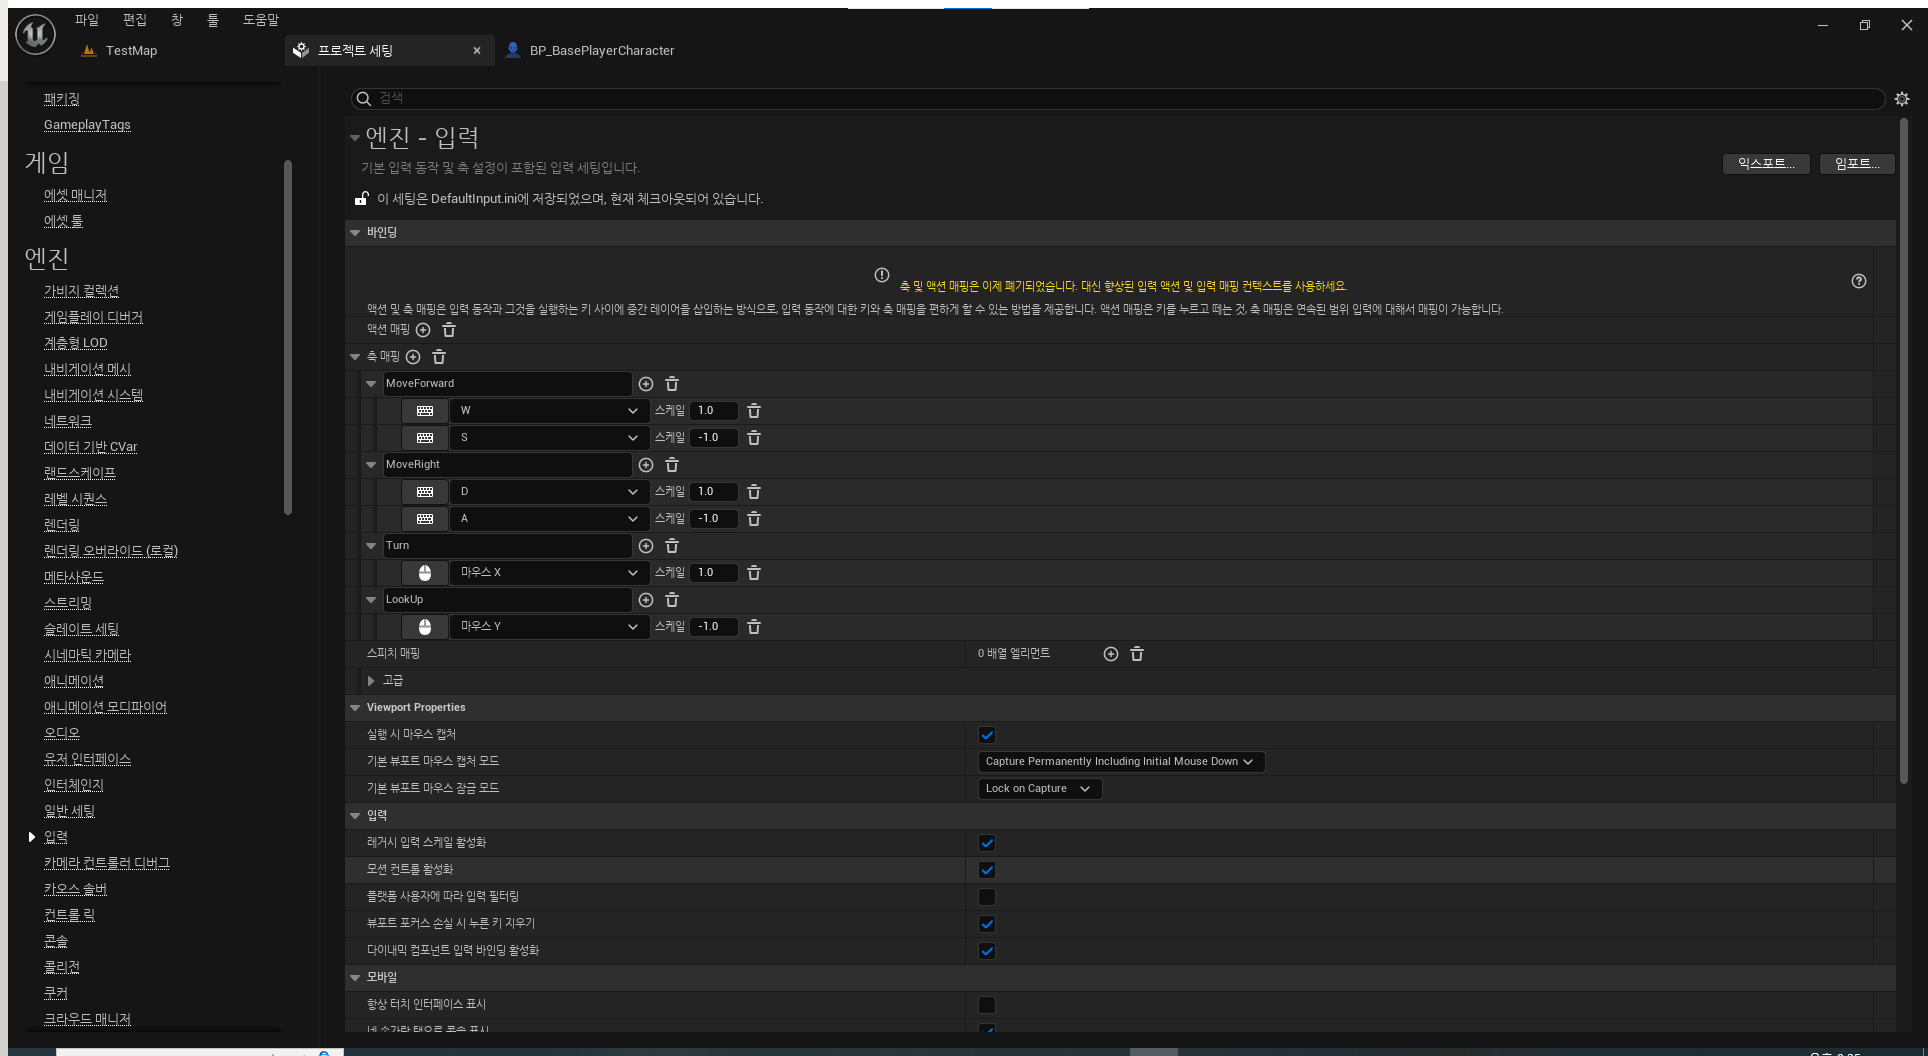
위 사진과 같이 MoveForward, MoveRigth, ... 등을 입력 키와 같이 매핑해 주면 된다.
이제 매핑한 축을 바인딩 해 준다.
바인딩할 클래스에서, 움직임을 구현할 함수와 기본적으로 캐릭터 클래스를 상속받으면 오버라이딩할 수 있는 함수인 SetupPlayerInputComponent에서 축 바인딩을 해 준다.
먼저 헤더파일에 함수를 선언해 준다.
protected:
	void MoveForward(float Value);
	void MoveRight(float Value);
	void Turn(float Value);
	void LookUp(float Value);
그리고 소스코드에 구현해 준다.
void ABasePlayerCharacter::SetupPlayerInputComponent(UInputComponent* PlayerInputComponent)
{
	Super::SetupPlayerInputComponent(PlayerInputComponent);

	// 프로젝트 세팅에서 설정한 축 매핑 이름과 구현한 함수를 바인딩(연결)해 준다. 여기서 FName()안에 있는 String이 축 매핑한 이름이다.
	PlayerInputComponent->BindAxis(FName("MoveForward"), this, &ABasePlayerCharacter::MoveForward);
	PlayerInputComponent->BindAxis(FName("MoveRight"), this, &ABasePlayerCharacter::MoveRight);
	PlayerInputComponent->BindAxis(FName("Turn"), this, &ABasePlayerCharacter::Turn);
	PlayerInputComponent->BindAxis(FName("LookUp"), this, &ABasePlayerCharacter::LookUp);
}


void ABasePlayerCharacter::BeginPlay()
{
	Super::BeginPlay();

}

void ABasePlayerCharacter::MoveForward(float Value)
{
	if ((Controller != nullptr) && (Value != 0.f))
	{
		const FRotator ControlRotation = GetControlRotation();		// 카메라의 회전각을 구함
		const FRotator YawRotation(0.f, ControlRotation.Yaw, 0.f);	// 현재 캐릭터(폰)의 Model 좌표계를 기준으로 Z축 기준의 회전각을 구함. 즉 월드 좌표계와 Z축은 평행하고, X축은 캐릭터의 전방방향을 갖는 회전을 구함
		const FVector Direction = FRotationMatrix(YawRotation).GetUnitAxis(EAxis::X); // 위에서 구한 좌표계에서 X축방향의 유닛 벡터를 구하면 그 벡터가 캐릭터의 전방을 향하는 벡터가 됨
		AddMovementInput(Direction, Value);
	}
}

void ABasePlayerCharacter::MoveRight(float Value)
{
	if ((Controller != nullptr) && (Value != 0.f))
	{
		const FRotator ControlRotation = GetControlRotation();
		const FRotator YawRotation(0.f, ControlRotation.Yaw, 0.f);
		const FVector Direction = FRotationMatrix(YawRotation).GetUnitAxis(EAxis::Y);	//MoveForward와 거의 같지만, Y축 방향의 유닛 벡트를 구했기 때문에 캐릭터의 오른쪽 방향의 벡터가 구해짐
		AddMovementInput(Direction, Value);
	}
}

void ABasePlayerCharacter::Turn(float Value)
{
	AddControllerYawInput(Value);	//Yaw는 Z축 기준으로 회전하는 것이기 때문에 좌우로 회전이 됨.
}

void ABasePlayerCharacter::LookUp(float Value)
{
	AddControllerPitchInput(Value);	// Pitch는 Y축 기준(캐릭터 오른쪽 방향)으로 회전하는 것이기 때문에 위 아래 회전이 됨.
}
반응형
'언리얼 엔진 > 기초' 카테고리의 다른 글
| [Unreal Engine5] Inverse Kinematics (0) | 2023.07.29 |
|---|---|
| [Unreal Engine5] Anim Instance 클래스로 걷기/점프 애니메이션 구현(2) (0) | 2023.07.23 |
| [Unreal Engine5] Anim Instance 클래스로 걷기/점프 애니메이션 구현(1) (0) | 2023.07.23 |
| [Unreal Engine5] 향상된 입력(Enhanced Input) (0) | 2023.07.08 |
| [Unreal Engine5] 모듈 추가하기 (0) | 2023.07.08 |


